Uncommon Events: Bat Cake Toppers…


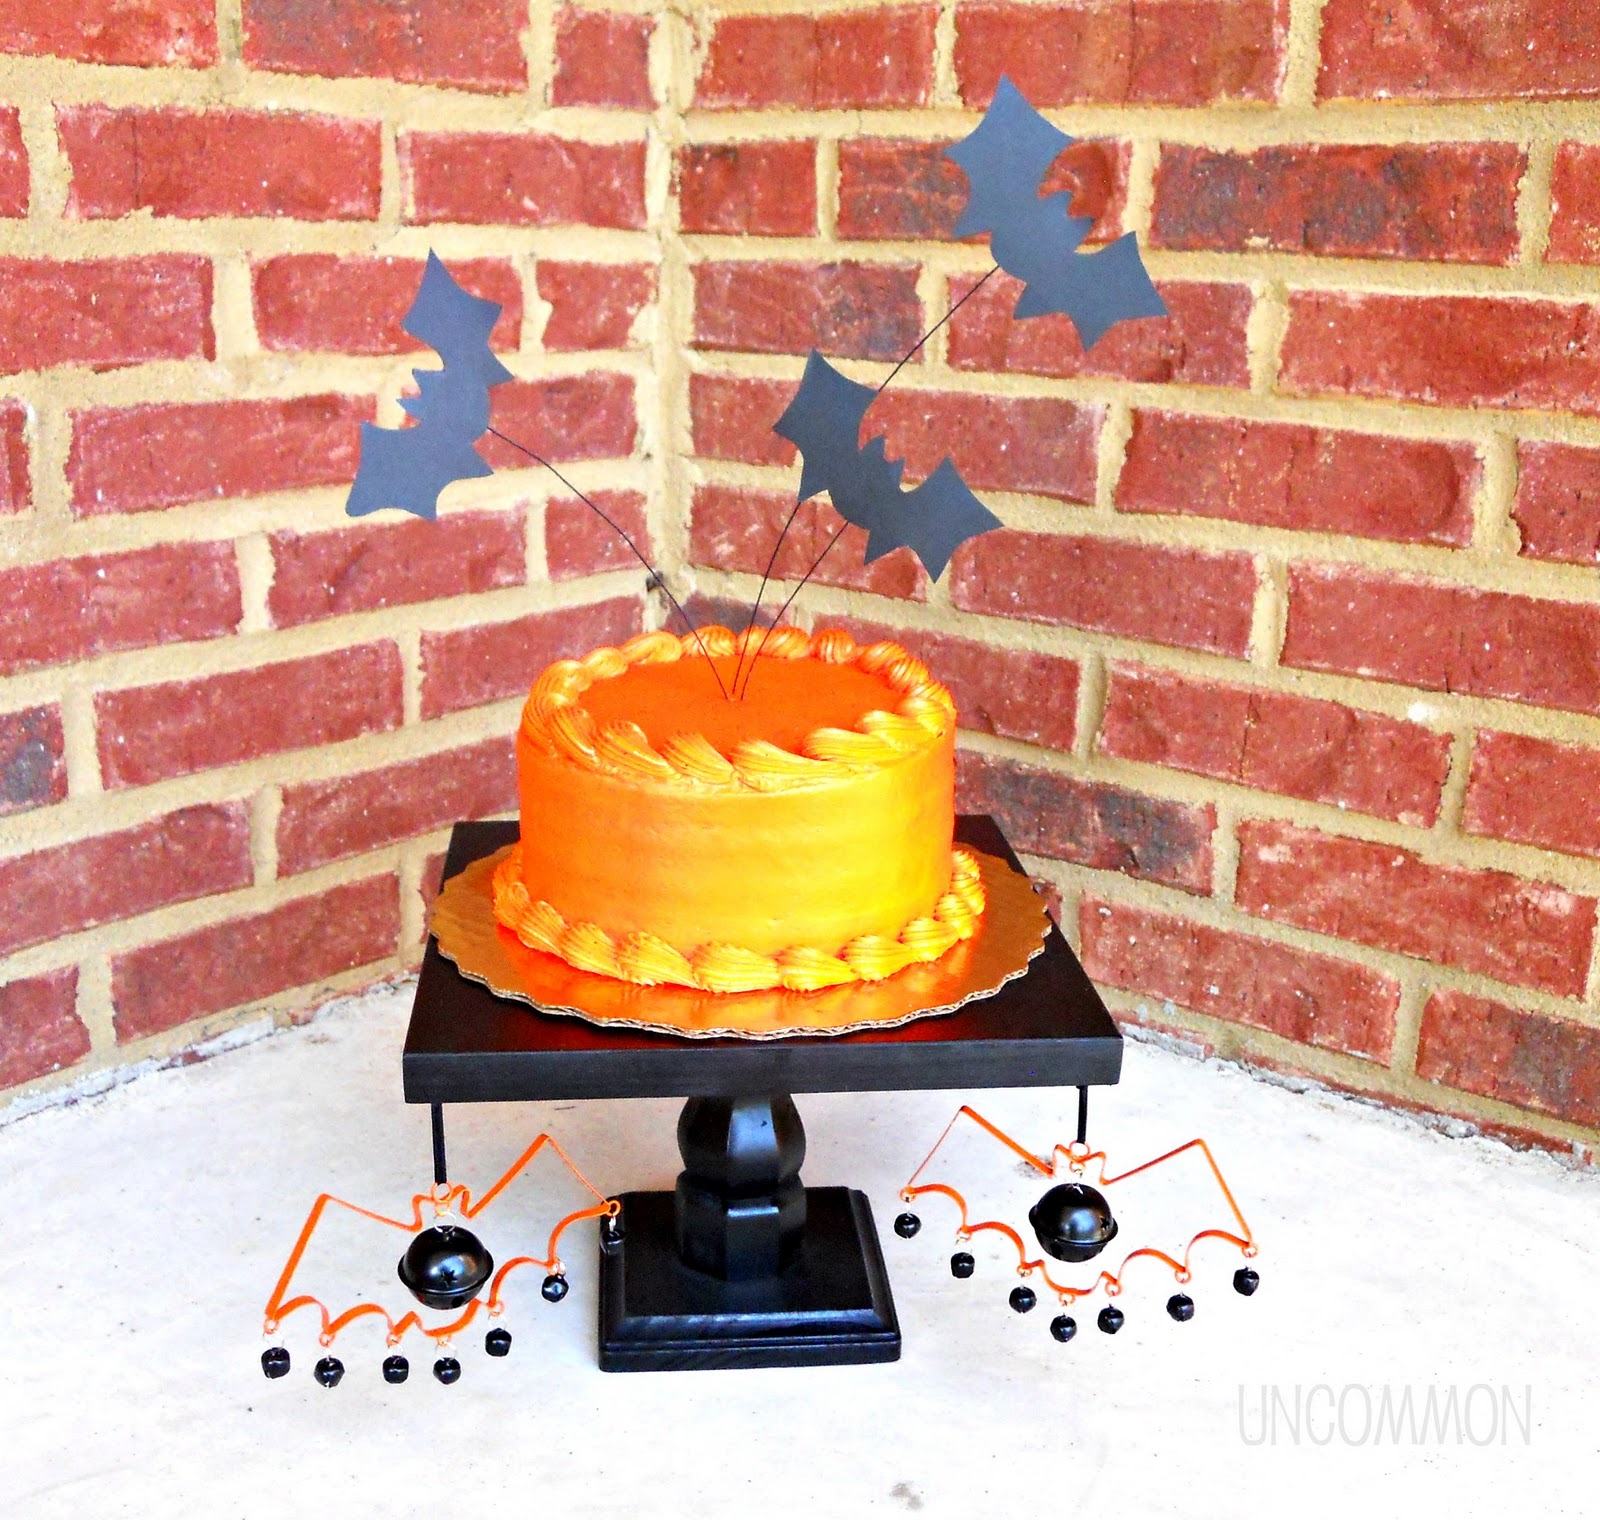
I can’t believe we are at the end of October already!  After this fun post, our Uncommon Events series will return after the new year begins.  Let’s face it… everyday is a party from now until 2012!  We have saved one of our all-time favorite Halloween party decorations… bat cake toppers!  They are perfect for that last minute treat!
bat ct supplies
Trace one bat onto the black paper for each cake topper.  I used a wooden cut-out from Michaels for my template.

052b

Cut out the bats.

054

Hot glue the florist wire to the back of the bat.
I washed mine, patted it dry, and colored it black with a non-toxic marker, but you could leave it white or silver.
056
Now place them in your cake at different heights.  You may need to clip your wire to make it shorter.  That’s it!  I was so excited to use my new cake stand!  Isn’t it so adorable? 
 Bonnie and Trish
We hope that you will click on over to see the rest of this post!
We would love for you to share this post...

RSS Contact Us Follow Us On Facebook Follow Us On Twitter Follow Us On Google+ Follow Us On Pinterest Follow Us On YouTube Stumble Us Follow Us On Instagram
Receive Uncommon Designs by email. Simply enter your email address and click subscribe to follow us:

Comments

  1. Love this!! Saw it on between You & Me!

  2. Oh the cake is adorable!

    I featured your yarn wrapped letters on my site. I hope you will stop by.

  3. Adorable! What a fun little cake topper! You are super creative!

  4. Love these! If I have time, I just might have to decorate the pumpkin cheesecake I’m making this weekend with something similar… so cute!

  5. Hi! This is very cool! I love it! Thanks for sharing this at the Crazy Cute party @ Between U & Me! Don’t forget to come back and enter for a chance to win the giveaway! :D

    http://www.betweenuandme.com

  6. cute. and simple too! I like it.

    Ameryn
    ohsonifty.blogspot.com

  7. This is super adorable. Love it on the orange cake!

  8. I featured this post today on my blog! Thanks for linking up! :D

    http://www.betweenuandme.com

Trackbacks

  1. [...] Find the full tutorial here.  Happy baking! Filed Under: Edible Crafts, Halloween, Uncategorized Tagged With: bat cake topper, cake topper, Halloween bat cake, Halloween cake, Halloween food /* */ [...]

  2. [...] other party ideas… we’d love for you to check out our Mummy Munch and our Bat Cake Toppers!  They are super easy and super fast to complete! /* .nrelate_related .nr_sponsored{ left:0px [...]

  3. [...]  If there is one thing I love about styling parties, it has to be the sweets table!  If you are planning out the table design, you will need to arrange your items at varying heights to keep the look interesting and polished.   Now, I am a cake stand lover, but my budget does not allow for one in every shape, color and size.  A simple DIY cake stand was exactly what would help! So, I decided that I needed to make one or four (hee hee!)  that I can embellish for a particular event. They ended up being pretty easy to make and I even used a power tool… a drill!  Now, for all of you ladies who can rock a sander or saw super for you, but I was just excited that I didn’t drill the stand to my deck! Here is how I made them… Cake Stand Tutorial Supplies: furniture legs (I got mine from Home Depot) rectangle or square 1 inch thick wood for the top smaller square plaque for the base (Hobby Lobby) drill and drill bits spray paint screws Step One. The first thing you will want to do is drill all of the pilot holes.  A pilot hole is where you drill a small hole into the wood where you will insert the screw.  It helps to make sure the wood won’t split!  You will need to drill one in the middle of the base piece, the top piece, and at the top of the furniture leg.  Step Two.  Now you will screw the furniture leg right into the base piece.  The legs come with one screw already attached at the bottom, so this is a super easy part! Step Three.  For this step, you will insert the screw into the pilot hole in the top and attach it to the furniture leg.  Just about all done! Step Four.  Painting time!  You will want to sand the cake stand to make sure your paint will go on smoothly.  Next, add a few coats of spraypaint in your favorite color.  Now you have a nice, fully functional cake stand for a fraction of the cost! At this point I could leave well enough alone, and use the stands as they are.  But…. well, you know me… I have to fancy them up a little!  Here are a couple of ways I have decorated them for events that I have styled, but the possibilities are endless… Halloween: ”Batty” Cake [...]

We'd love to hear from you...

*

CommentLuv badge